
Shinnoki Veneer has become a favorite among architects, interior designers, and homeowners who want the warmth of real wood without sacrificing consistency or quality. Combining natural wood veneer with a factory-finished surface, it delivers a refined appearance that suits both modern and timeless interiors.
From custom kitchens to built-in cabinetry and commercial spaces, Shinnoki Veneer offers a premium solution that balances beauty, durability, and efficiency.
Why Shinnoki Veneer Stands Out
Unlike unfinished wood veneer, Shinnoki Veneer arrives prefinished and ready for fabrication. This streamlines production while ensuring a uniform appearance across every panel.
Its authentic wood grain adds natural character without the inconsistencies often found in traditional finishing methods. Homeowners exploring premium cabinetry can also browse DreamLine Custom Cabinetry for additional inspiration.
- Real wood veneer
- Factory-applied finish
- Consistent color and texture
- Contemporary and classic styles
- Suitable for residential and commercial interiors
Ideal Applications
One of the biggest strengths of Shinnoki Veneer is its versatility. Designers use it throughout the home to create seamless, sophisticated interiors.
Popular applications include:
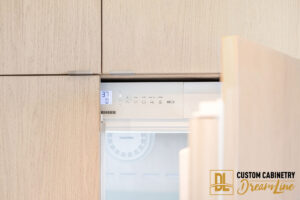
- Kitchen cabinetry
- Bathroom vanities
- Entertainment centers
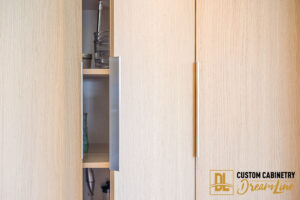
- Closet systems
- Wall paneling
- Office furniture
- Reception desks
The ability to maintain a consistent finish across multiple surfaces creates a clean, cohesive design. See how premium wood finishes enhance luxury spaces in The Natural Appeal of Luxury Kitchen Cabinetry: A DreamLine Project in San Carlos, CA.
Benefits for Homeowners
Choosing quality materials affects both appearance and long-term satisfaction. Shinnoki Veneer delivers a premium look while reducing many of the challenges associated with finishing natural wood on-site.
- Uniform appearance from panel to panel
- Reduced installation time
- Durable protective finish
- Low maintenance
- Timeless natural wood aesthetics
For homeowners planning a kitchen or whole-home renovation, these advantages translate into a smoother remodeling experience and a finished product that continues to look exceptional for years.
Choosing the Right Finish
Every project has its own personality. Lighter wood tones create an open, contemporary feel, while darker finishes introduce warmth and sophistication.
Before selecting a finish, consider:
- Natural lighting
- Flooring color
- Countertop materials
- Cabinet hardware
- Overall architectural style
Coordinating these elements helps create a balanced interior that feels intentional rather than trendy. For homeowners considering painted or stained alternatives, the SEGUE paint series and GENESIS stain series offer additional premium cabinetry options.
Final Thoughts
Shinnoki Veneer offers an excellent combination of natural beauty, manufacturing precision, and lasting performance. Its consistent finish, authentic wood appearance, and versatility make it a preferred choice for designers seeking premium results.
If you’re planning custom cabinetry or a luxury interior renovation, selecting high-quality materials like Shinnoki Veneer can elevate the finished space while providing lasting value and timeless appeal. You can also explore the sleek ELEMENTS ECO acrylic series or learn more about selecting premium cabinetry in How to Choose the Best Custom Cabinets: A Step-by-Step Design Guide.